I wanted to find new ways of documenting and cataloguing my garden, originally when I conceived the idea I was going to document each plant I found in four different ways-
· Photograph
· Drawn Illustration of the plant in situ
· Dry and press the plant using a flower press or a homemade press for larger plants
· Write about the plant using reference books (the plants chemical compounds, uses in herbalism and modern medicine, other uses the plant has e.g. nettles used in the first world war by the German’s to make uniforms)
And produce a book of the work; this is a very conventional way of documenting flora and fauna and I wanted to move away from convention and create a design that incorporated shape, line, and form.
In addition, this level of documentation is time consuming and requires a level of dedication (possibly one for retirement or the summer holidays only!).
Animal footprints
Silhouettes of butterflies, moths, lizard, flowers
Map of Derainey
Illustrations of honey suckle, iris’s, nettles, bind weed etc.. I had done over the last couple of years as well as photographs I have of the moths that have been documented in Derainey by an Irish moth specialist.
I started to create a map using the animal footprints on one side and a map of Derainey on the other
I stiffened the canvas with fabric stiffener, cut out stencils of animal tracks, and used black acrylic paint to create the image. This was not working well but because I had stiffened the fabric, it made it almost impossible to embroider or sew on beads etc.. I also felt it was a little contrived and not as spontaneous and as I wanted. Even though I had spent time on construction of the map, images to go on the map the design was lacking in line, form, and shape.
 |
| Embroidery Running stitch on canvas map |
 |
| Stenciled animal foot prints on canvas map |
Creating the design on silk
To create more line and shape I constructed a grid using the map folds idea, I produced a grid containing 16 oblong boxes with space between the boxes representing picture frames.
To express the delicate and fragile nature of the flora and fauna I used silk. The properties of silk: natural product, delicate, strong but can be easily ripped or torn, soft to the touch, and woven to make a very fine material, it can be folded and placed in your pocket.
I decided to use only one colour, black on the batik with a hint of red and green by using fabric paints. I was inspired by other black and white batiks I saw on the internet.
Step by step guide to producing a Batik design of Flora and Fauna on silk
 3. Using wax resist to create a design on silk by following the drawn lines or filling in the back ground
 4. Using Batik tools and paint brushes, different Batik tools create different effects on the silk depnding on how large the hole is that lets the wax run. Paint brushes can be used in different ways depending on the size and shape. I used very small paint brushes to give detail to the work.
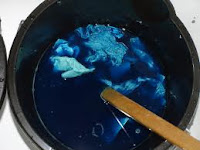
 5. Dyeing the silk - I followed the instructions on the dye packet and left the silk in the buket for 30 minutes to make sure I had a strong black colour.
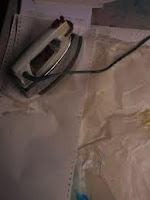
 6. Ironing the silk to remove the wax - it took lots of news print paper to remove all the wax from the silk.
7. Finished Batik
I should have spent more time on my design, I found it very easy to go off on a tangent and look at human geography, maps of the world, ancient maps, typography of 1910 – 1920, think about photograph albums, portraiture, map folds, map typography….. the list goes on, instead on focussing on my design. Although I do feel, I have a number of scheme ideas from this one project especially around fabric printing and mapping.


No comments:
Post a Comment